Effortlessly Manage Your Vacation Rentals: A Step-by-Step Guide creating your property on Rental Ninja
Introduction
Managing vacation rental properties can be a daunting task, especially if you're new to the industry. But fear not! Rental Ninja has got you covered. Our user-friendly software makes it easy to add, set up, and manage all your properties in one convenient place. Let's dive into a step-by-step guide to help you get started.

Step 1: Adding a New Property
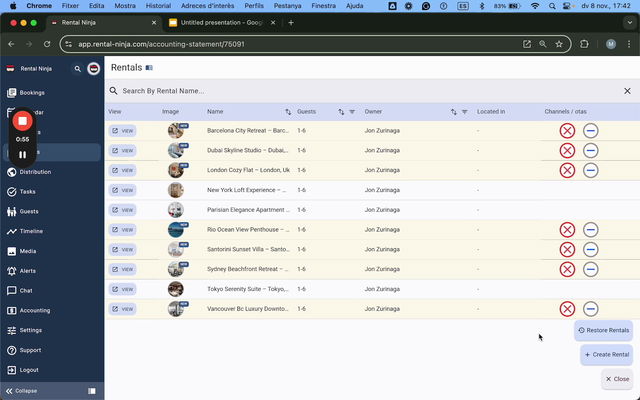
Start by adding your property to the Rental Ninja portfolio. Enter basic details like the name, owner, and type of rental.
Step 2: Setting Up Your Property

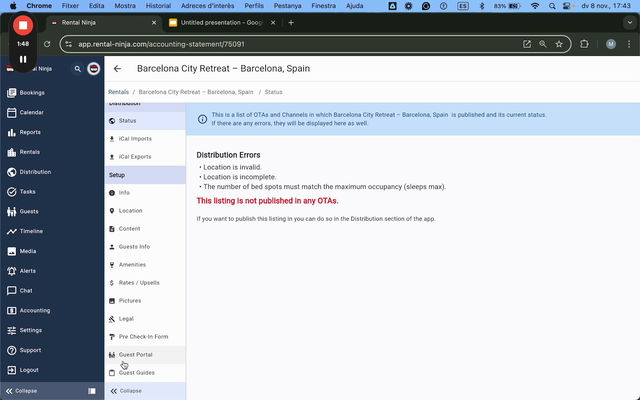
Information: Provide property details like the address, surface area, and currency.
Content: Compose captivating property descriptions using "magic writing" to boost your search engine visibility.
Guest Information: Set guest check-in and departure times, Wi-Fi details, and contact information for maintenance.
Amenities and Rooms: Define the available amenities, sleeping arrangements, and room configuration.
Financials: Establish booking rules, including minimum stay, nightly rates, damage deposit policies, and cancellation terms.
Synchronization: Connect with online travel agents (OTAs) like Airbnb and Booking.com to expand your reach.
Legal: Upload necessary legal documents and set up city tax payments.
Step 3: Uploading Pictures and Final Touches
Enhance your property listing with high-quality pictures and apply our image optimization tools to make them shine.
Step 4: Publishing Your Property
Once your property is set up, it's time to publish it to make it available for booking. We'll guide you through this process in a separate video.
Benefits of Using Rental Ninja
Effortlessly manage multiple properties in one place
Streamline the setup process with user-friendly tools
Boost bookings with search engine-optimized descriptions
Customize booking rules to maximize revenue
Integrate with OTAs to increase visibility
