How to add your Properties to your Account with ICAL
How can you use ICAL to add properties to your account?🫶
Hello! We're delighted to have you here.
It is possible to link your Rentals directly to the platform using an Ical connection.
In this article, we will explain how to add properties to your account with Ical calender.
How do I add rentals to my account using ICAL?
Step by Step
Create your Rentals.
Go to the Rentals Page
You will see that there are Rentals "To be filled", click on them to fill out the needed details.
There will be as many "To be filled" Rentals visible as you requested during the subscription of the account.
Fill out the name of the property and the sleeping capacity.
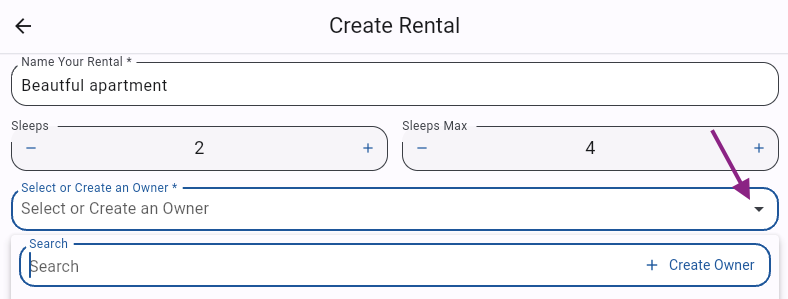
Indicate who the Rental Owner is.
Since you will not yet have created any Rental Owners, you will need to do so now. So, click on "Create Owner" and fill out the requested details.
If needed, you can edit the details of all Rental Owners later by going to Settings > Rental Owners.
\. Fill out the country, currency, address, and zip code of the Rental.
\. Click on "Create"
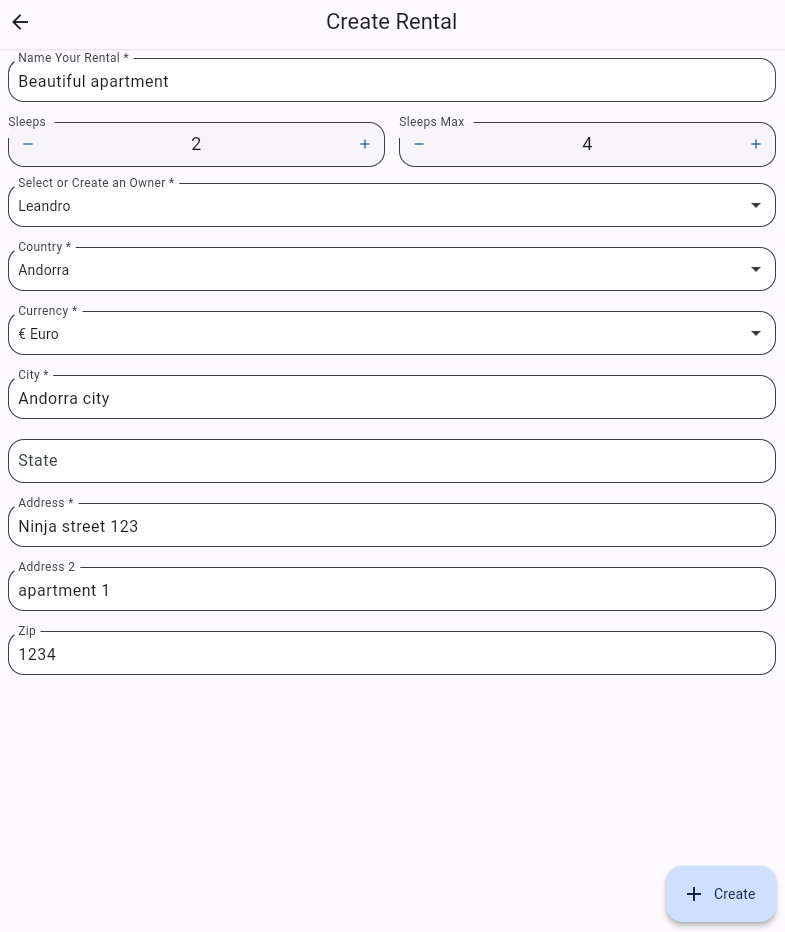
Great, you have now created your Rental(s)!
Note: If you'd like to add more Rentals to your account, you can always do so by going to the Rentals Page and clicking on "+ Add Rentals" on the lower right side of your screen.
Next, how to connect your Rental to the Booking Channels with iCal?
First, Booking Sources.
Create your Booking Sources by going to Settings > Booking Sources
Click on "Create Booking Source"
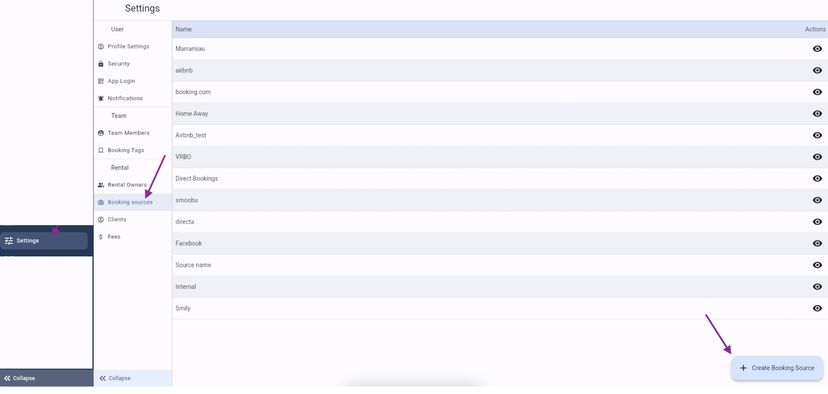
Fill out the name of the Source you want to create and click on "create"
Next, link the Rentals to your Booking Channels.
Go to Rentals
Open a Rental
Go to "iCal Imports"
Click on "+ New iCal Import" on the lower right side of your screen
![]() Give the Sync a name.
Give the Sync a name.
Fill out the ICAL URL that you retrieved from Airbnb, Booking.com, or any other Booking Channel you'd like to connect to with our platform.
Choose the Source you want to link with.
Save it
You can import as many Syncs as you'd like to, in case you want the platform to receive the information of various channels.
Do you also want to Export the Ical information from our platform to the Booking Channel?
You can do so through the Export Sync option.
Go to iCal Exports and click on "+New iCal Export"
![]() 2. Give it a Name.
2. Give it a Name.
Choose which Bookings you would like to export through the iCal link (Bookings can be filtered by Booking Source)
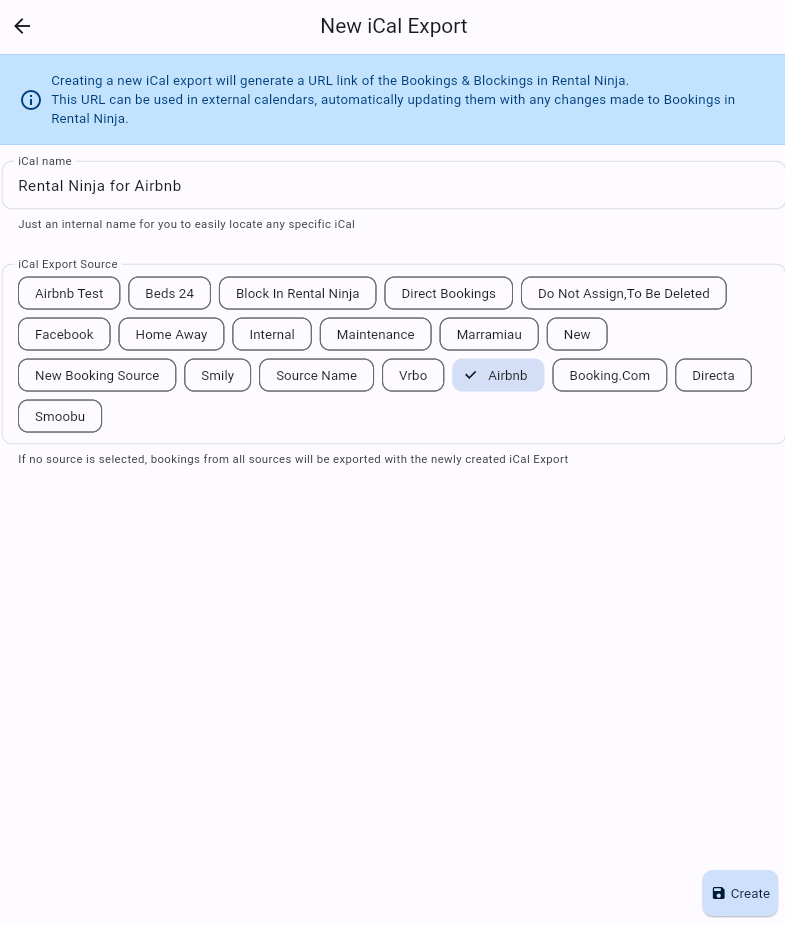
Click on Create.
Now, copy the Export link and paste it into the desired Booking Channel.
You can create as many export links as you'd like and copy the links easily.

Done, you have now linked your Rental to your Booking Channel(s).
From now on, the platform will automatically receive the Booking details shared by the external Channel(s) through their ICAL link.
Apart from receiving Bookings through the ICAL links, you can also Create/Edit Bookings/Blockings directly.
Before doing so, it is important that you create your Fees to indicate what "extras" you can charge to your Guests aside from the Rental Price.
Examples of Fees: Cleaning Fee, Tourism Tax, Pet Fee, Late Check-in Fee, Welcome Package, Extra Linen Fee.
First, how can I create Fees?
Go to Settings > Fees
Click on "Add Fee"
Give it a name
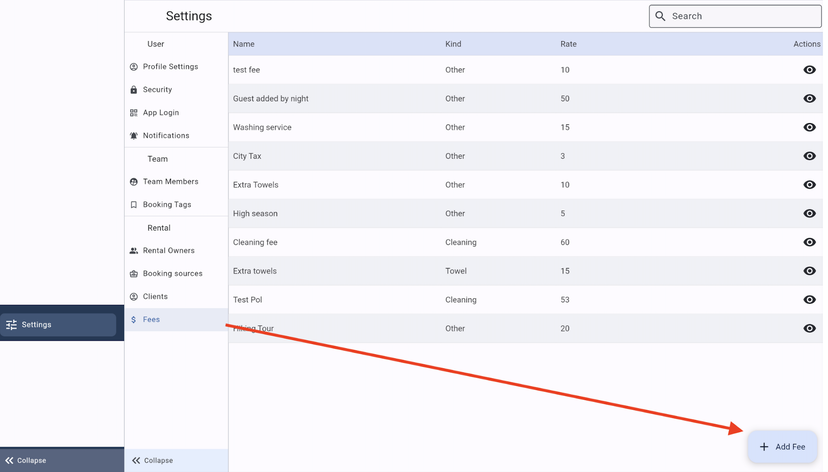
Indicate what kind of Fee it is.
Indicate the value/rate
Click on "save"
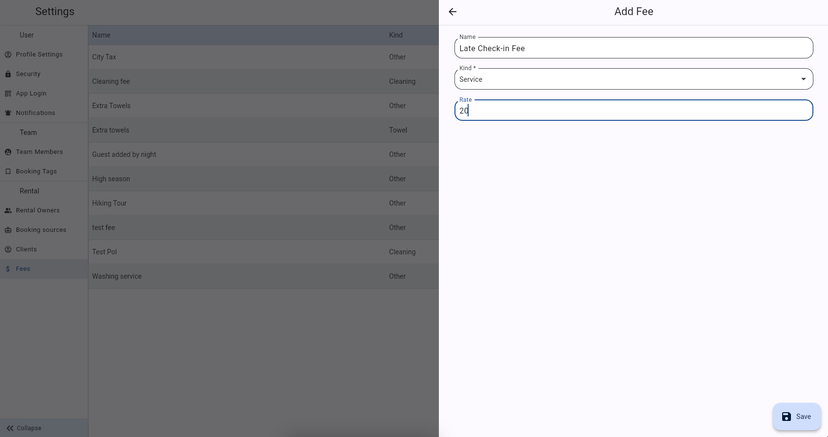
Done, you can create as many Fees - with different values- as you'd like. Note! It is possible manually edit the values of the Fees inside each Booking.
How do I create Bookings/Blockings directly?
You can create Bookings/Blockings from various sections:
Through the Bookings list (Occupied - Arrivals - Departures tabs)
By going to: Rentals > View a Rental > Calendar/Future/Past tabs.
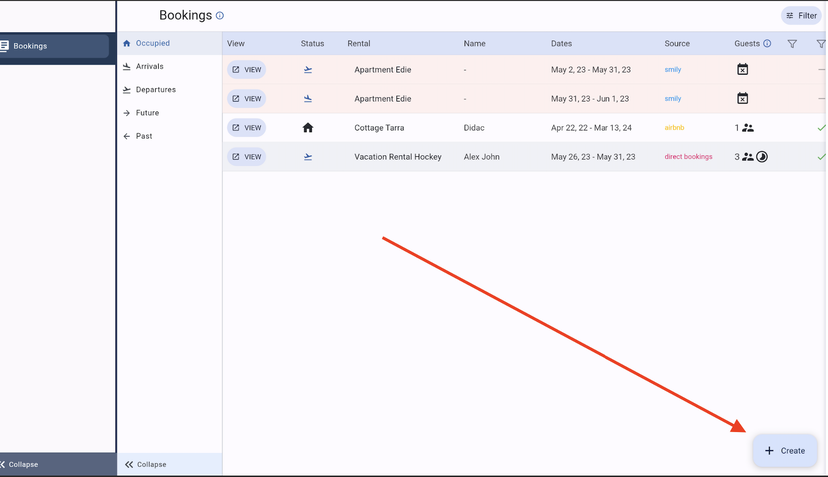
From there, you will be able to create the Booking:
1\. Click on "+ Create"
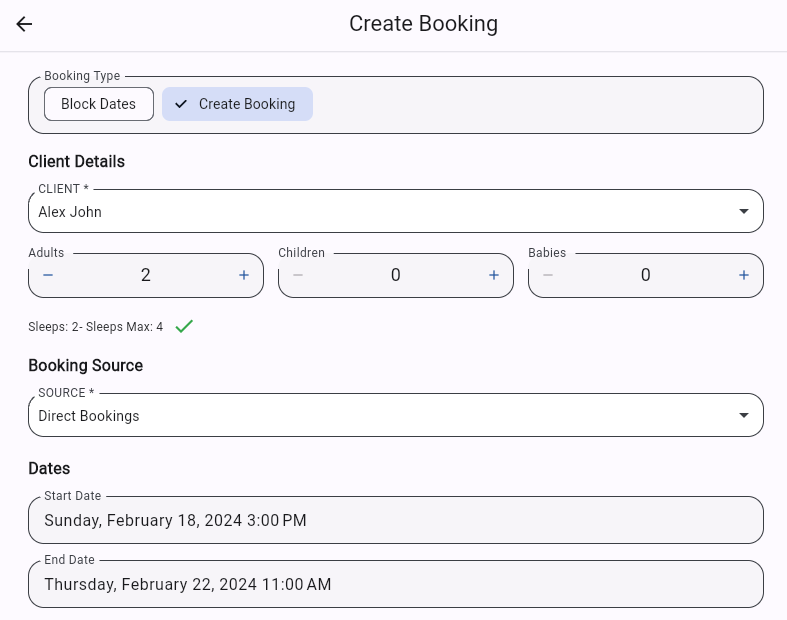
2\. Choose if you want to Block dates or Create a Booking
Block dates:
3\. Choose the Dates
4\. Optional: Add Notes
5\. Click on "Save" ![]()
Create a Booking:
1\. Choose an already existing Client/Guest in the file or create a new Client/Guest
2\. Indicate the Guest Amount
3\. Indicate the Booking Source
4\. Choose the Dates
5\. Indicate the Rental Price
6\. Optional: Add Fees, such as a Cleaning Fee, Tourism Tax, Welcome Package, etc. (These Fees need to have been set up beforehand in Settings > Fees)
7\. Optional: Add a Damage Deposit amount
8\. Optional: Add Notes ![]() 9\. Click on "Save"
9\. Click on "Save"
Done, you have created your Booking/Blocking.
