Scheduled Statements + Payments
Unlock Efficiency and Punctuality in Your Financial Operations for Vacation Rentals Explore the Power of Scheduled Statements and Payments.
To further automate your Accounting, schedule your Statements and the related Payments.
It requires a one time setup; after that everything will be automatically generated for you!
Optimize Financial Flow in Short Term Rentals: Scheduled Statements and Payments for Seamless Efficiency
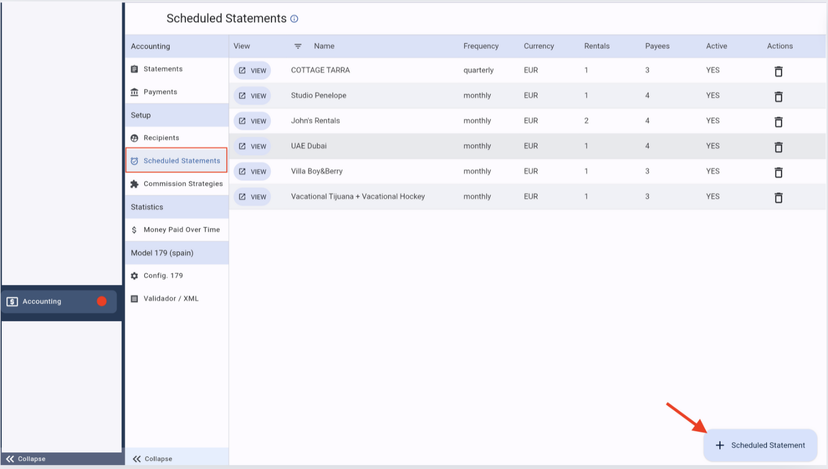
Go to the Accounting Module > Scheduled Statements and click on the + Scheduled Statement on the lower right side of your screen.
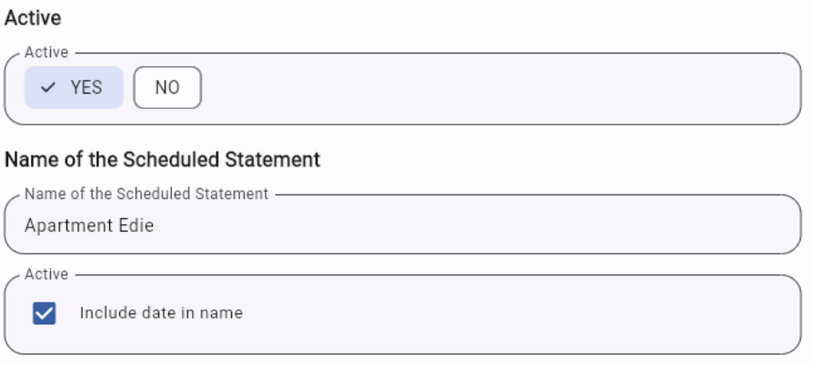
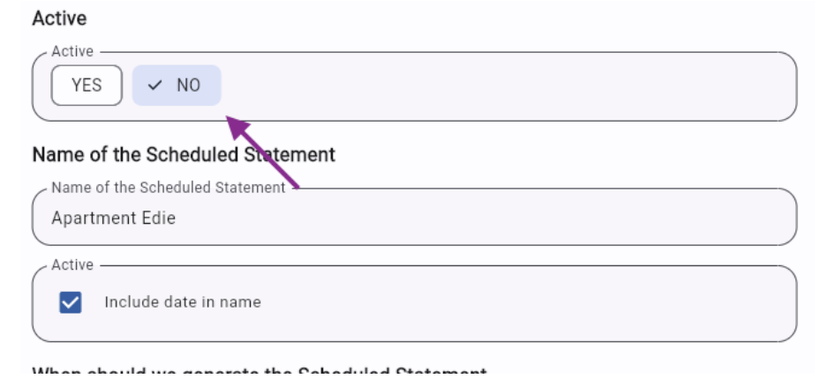
Give the Scheduled Statement a name. We recommend you use the name of the Rental or the Rental Owner.
By clicking on the checkbox, you will can include the Date of the Statement in the title of the Statement:
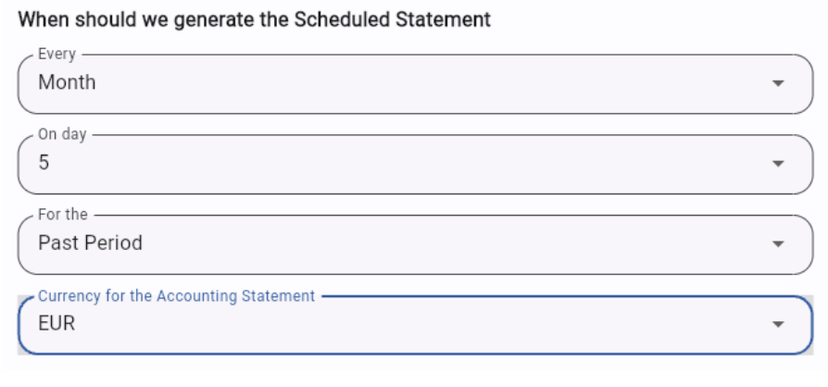
Choose when the Statement is to be generated
The Statement can be generated Monthly - Quarterly - Half Yearly - Yearly.
Indicate on which day of the period it has to be generated.
Note! The options First / Last refer to the very first / last day of the selected period. For example: when selecting every half year: first = January 1 + June 1st, last = May 31st, December 31st.
Indicate for which period each Statement is to be generated: Past, current or next period.
Example: You'll be generating Monthly Statements on the first day of each Month for the past period. In this case, on the 1st of February, the Statement of January will be generated, etc.
Select the currency in which the Statement is to be created.
Receiving bookings in multiple currencies? Then, keep in mind that each Statement will only include 1 currency type.
For example: if you are receiving bookings in USD + EUR and you'd like to automate your Statements monthly, you'll need to Schedule a Monthly Statement for the desired Rentals in both currencies: 1 Scheduled Statement in EUR + 1 Scheduled Statement in USD.
Select the Rentals to be included in each Statement
Select which Recipients will need to have a Payment automatically created for this Scheduled Statement. Please, note the following:
The Payments will be automatically created for the Statement according to the Strategy of each Recipient.
You'll still be able to manually edit the Payment + add extra items to it after its automatic creation.
The Payments will be created for you when opening each automatically generated Statement for the 1st time. Depending on the amount of Payments that need to be created, it may take a few moments to load them all.
![]() Done, you have set up the Scheduled Statements & Payments!
Done, you have set up the Scheduled Statements & Payments!
From now on, the Statements & Payments will be automatically generated for you on the indicated date.
## Important notes
Don't want the Scheduled Statement to be automatically created anymore? Then, simply deactivate it by going to: Scheduled Statements > Active > No
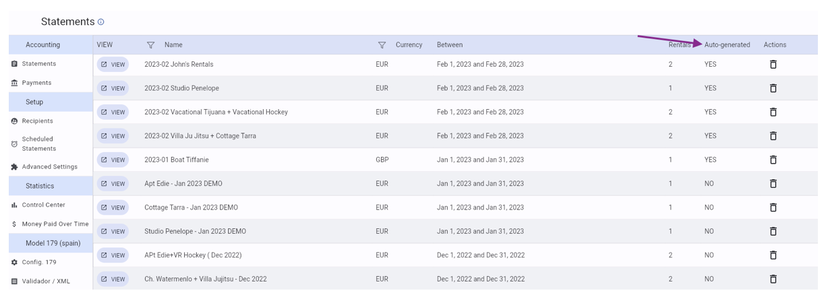
In the Statements list, you can easily identify if a Statement was automatically generated for you or if it was manually created by any of your Team Members:
